Drywall Sheet Rock Hanging Tool for Easy Safe Installation
- Safe and easy Drywall Sheet rock installation both for walls and ceilings.
- One person operation or with a helper.
- Handy for remodeling contractor with limited help or for professional drywall company with smaller crews.
- Overcome the challenge of lifting heavy items alone during installations.
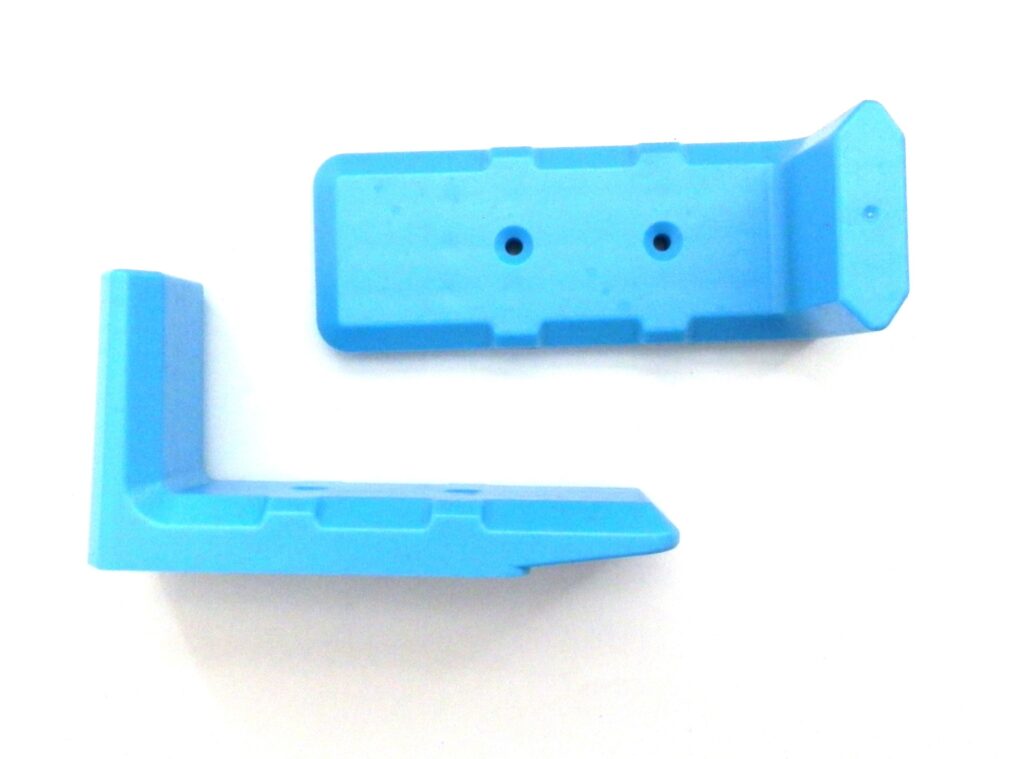
- Simple one piece design, no assembly required, no moving parts.
- Eliminate dangerous makeshift tools made from scrap or trash on the job.
- Affordable easy on the pocket book.
- May be great for a variety of uses on the job or around the house.
- Easy to read instructions included.
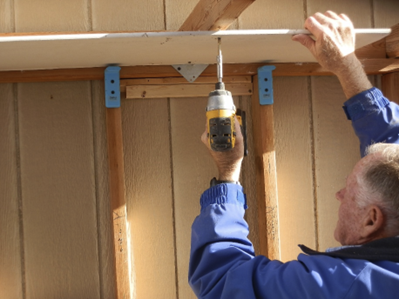
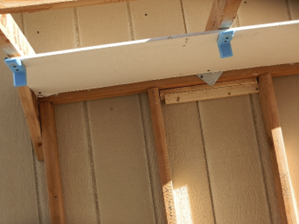
Typically the ceiling is installed first, place two devices approximately 1/2 inch down from the truss wet sufficiently apart so they will support the sheet. From the corner of the room measure out from the wall you will be starting from at both ends of the room four feet and make a mark. Then chalk a line 4 feet out from the wall you are starting from, from wall to wall, this is to help keep the row of sheet rock running straight. Before you start installing sheets you should mark on the top plate about 1 inch down on the side of the top plate where each truss is attached to the top of the wall, this will help you locate the trusses where you need to install screws. Slide the sheet between the devices and the trusses and hold opposite side with one hand. The devices will hold that edge of sheet rock allowing you one hand to operate a screw gun. Install the first couple of screws in the sheet at the side which is not being supported by the devices. Once you have installed sufficient screws to hold the sheet (temporarily) you can move the devices to the next sheet location. Complete installing screws in the sheet you just attached. Building code requires in a 4 foot sheet 5 screws for each truss or row.
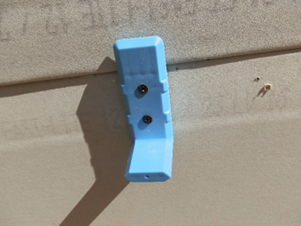
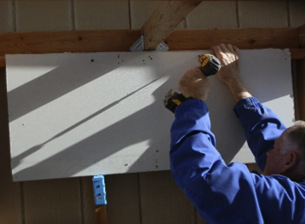
To start the next row turn the devices around and screw it through the edge of the formerly installed sheet. Notice there is a notch, line the start of the notch with the edge of the existing sheet. The notch is one inch, this is to allow room to slide the next sheet over the notched area. It is important that you use 2 screws to prevent the device from spinning while you are sliding the sheet into place. Install 2 devices in this manor so the sheet will be stable while you attach some screws to the opposite edge
To start the wall installation measure down the wall at both corners of the room 4 feet and make a mark at each corner. Install 2 devices where you are planning to install the sheet. Typically you would start at one end of the room. You may want to add 1/4 inch to give room for adjustment, Then Chalk a line from corner to corner on the wall studs you are going to hang the upper row. Measure a few places from ceiling to the chalk line along the wall. The ceiling is rarely perfectly straight. This will help you know if you will need to adjust the line a little. If the ceiling is way wavy you may need to do some trimming or shaving the upper edge of the sheet so the row will be straight. Before you hang the sheet you should mark on the ceiling where the wall studs are so when you cover the studs with a sheet you will know where to start your screws.
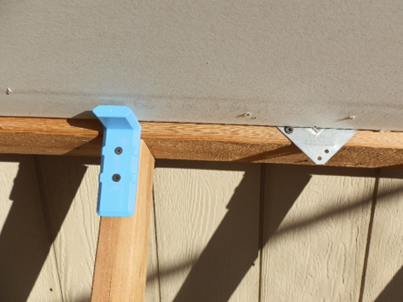
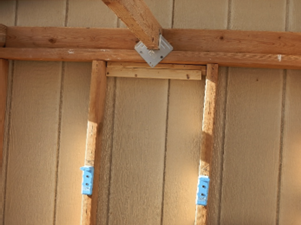
On this picture look where the truss cord is in relation where the device is on the stud. If the ceiling had already been installed you wouldn’t be able to see the stud at the top.
This product is available on AMAZON, search for Thing 3 Drywall Buddy